Table of Contents
- Assess Your Current Parking Garage Lighting System
- Choose the Right LED Retrofit Kit and Fixtures
- Design Your Parking Garage Lighting Layout
- Install Parking Garage Occupancy Sensors
- Implement Parking Garage Lighting Controls
- Calculate LED Retrofit Energy Savings and Payback
- Execute Installation and Verify Performance
- Frequently Asked Questions
Last Updated: October 11, 2026
Assess Your Current Parking Garage Lighting System
The first step in any successful LED retrofit for parking garages is understanding what you’re working with. Most facility managers inherit lighting systems installed 15 to 25 years ago, often a mix of HID, metal halide, and high-pressure sodium fixtures that consume enormous amounts of energy while delivering inconsistent light levels.
Before you spec a single LED retrofit kit, you need three pieces of information: what fixtures you have, how much power they’re drawing, and where the dark spots are.
Document existing fixtures and wattage
Walk your garage with a clipboard or mobile device. Note the fixture type, wattage, and mounting height for each section. HID fixtures typically run 250W to 400W. Metal halide units pull 150W to 400W. High-pressure sodium lamps range from 70W to 400W depending on age and application. These numbers matter because they determine your retrofit kit specifications and energy savings potential.
Take photos of representative fixtures from different areas. Photograph the ballast and any nameplate data. This documentation becomes your baseline for calculating payback and comparing retrofit options later.
Measure light levels and identify dark areas
Use a light meter app or handheld photometer to measure illumination levels in foot-candles across the garage. Most parking codes require minimum 0.5 to 1.0 foot-candles in driving lanes and 0.1 to 0.2 foot-candles in parking spaces. Mark areas where readings fall below code requirements, these are your priority retrofit zones.
Pay special attention to corners, stairwells, and transition zones between lit and unlit areas. Uneven light distribution creates safety hazards and is a common complaint from facility users. Document these dark spots in your assessment report; they’ll inform your lighting design later.
Choose the Right LED Retrofit Kit and Fixtures
Not all LED retrofit kits work with all existing fixtures. Compatibility is the critical decision point here. You’re choosing between three main retrofit approaches: direct retrofit kits that fit into existing fixtures, replacement fixtures that swap out the old unit entirely, or a hybrid approach using LED modules with compatible drivers.
Replacing HID, metal halide, and high-pressure sodium
HID and metal halide fixtures can often accommodate LED retrofit kits designed for high-bay applications. These kits typically include an LED module and a compatible driver that replaces the existing ballast. The advantage is speed: no rewiring, minimal downtime, and your existing fixture structure stays in place.
High-pressure sodium fixtures present a different challenge. Many older sodium fixtures lack the internal space or electrical compatibility for direct retrofit kits. In these cases, full fixture replacement is often the better path.
The real difference comes down to fixture age and condition. If your existing fixtures are structurally sound and have good mounting infrastructure, retrofit kits save money and installation time. If fixtures are corroded, damaged, or electrically unreliable, replacement fixtures eliminate future maintenance headaches.
Wattage, lumen output, and color temperature selection
Your retrofit kit or replacement fixture should match or exceed the lumen output of the original fixture while using 40 to 60 percent less power.
Color temperature matters more than most facility managers realize. Parking garages traditionally used 4000K (cool white) or 5000K (daylight) fixtures. These cooler temperatures improve visibility and reduce the yellow cast of older sodium lighting. Stick with 4000K to 5000K for consistency with modern expectations and to maintain visibility standards.
Verify that your retrofit kit’s LED module includes an integrated heat sink rated for the ambient temperature range in your garage. Parking garages experience temperature swings, humidity, and salt air exposure (especially near coastal areas). Poor heat management shortens LED lifespan dramatically.
Fixture compatibility and LED modules
Compatibility is non-negotiable. Before ordering retrofit kits, confirm that the LED module and driver match your existing fixture’s electrical specifications. Voltage requirements, ballast compatibility, and socket types must align. A mismatch means wasted money and installation delays.
LED modules come in different configurations: some integrate the driver internally, others require a separate driver unit. Shoebox fixtures (the rectangular units common in parking garages) typically use modular LED systems where the driver mounts separately from the light engine. Garage fixtures often use integrated drivers to simplify installation.
Request spec sheets from your retrofit supplier that clearly state compatibility with your exact fixture model. If your garage has mixed fixture types, you may need multiple retrofit kit options.
Design Your Parking Garage Lighting Layout
Once you’ve selected your retrofit kits and fixtures, you need a lighting design that meets code and eliminates the dark spots you identified earlier. This isn’t guesswork; it’s photometric design.
Light distribution and code compliance
Parking garage lighting codes vary by jurisdiction but generally follow these minimums: 0.5 to 1.0 foot-candles in vehicle lanes, 0.1 to 0.2 foot-candles in parking spaces, and higher levels (1.0 to 2.0 foot-candles) in pedestrian walkways and stairwells.
Modern LED fixtures distribute light more efficiently than older HID systems. A well-designed LED retrofit often achieves better light uniformity with fewer fixtures, which means lower installation costs and faster payback. The key is fixture spacing and mounting height.
Work with your retrofit supplier to create a photometric layout showing predicted light levels across your garage. This layout becomes your installation blueprint and your proof of compliance. It’s also your defense if a safety incident occurs, documented compliance with code is critical.
Avoiding dark spots and uniform coverage
Dark spots typically occur at transitions between fixture zones, in corners where fixtures don’t reach, and in areas with obstructed sight lines (pillars, structural elements, parked vehicles). Your photometric design should account for these obstacles.
The solution is often a combination of fixture repositioning and additional fixtures in problem areas. Sometimes moving a fixture 10 feet eliminates a shadow. Other times, adding a single fixture in a corner solves the problem. This is why pre-retrofit assessment and photometric modeling matter, they prevent costly redesigns after installation begins.
Install Parking Garage Occupancy Sensors
Occupancy sensors transform a static LED retrofit into an intelligent energy-management system. These sensors detect vehicle or pedestrian presence and dim or turn off lights when areas are unoccupied, cutting energy consumption by 20 to 40 percent depending on usage patterns.
Motion sensors work well in parking garages because they respond quickly to vehicle movement. Pair them with daylight harvesting sensors in areas with natural light exposure (near skylights or exterior walls). During daylight hours, these sensors reduce artificial lighting levels automatically.
Occupancy sensors add cost to your retrofit project, but the energy savings typically recover that cost within 2 to 4 years. More importantly, they address one of the biggest objections from facility users: lights staying on in empty sections of the garage.
Get a Free Property Assessment →
Implement Parking Garage Lighting Controls
Smart controls are the next evolution beyond simple occupancy sensors. Networked lighting controls allow you to schedule dimming by time of day, respond to occupancy patterns, and adjust light levels remotely from a central dashboard.
Dimming, scheduling, and smart controls
Scheduling works because parking garage usage patterns are predictable. Peak hours during morning and evening commutes demand full light levels. Mid-day and late-night usage is lighter. Your control system can dim fixtures to 50 to 70 percent during low-occupancy periods, cutting energy consumption without compromising safety.
Smart controls integrate with building management systems, allowing facility managers to monitor lighting performance in real time. You can identify malfunctioning fixtures immediately instead of waiting for a complaint. You can adjust schedules seasonally as daylight hours change.
These systems typically communicate via low-voltage control wiring or wireless protocols. Wireless controls avoid the cost of running new control wires through your garage, which is a major advantage in retrofit projects.
Calculate LED Retrofit Energy Savings and Payback
The business case for your LED retrofit rests on three numbers: your current energy consumption, your projected consumption after retrofit, and your utility rate. Get these right, and the ROI becomes clear.
Estimating power consumption reduction
Start with your current annual electricity bill for garage lighting. Divide by your average utility rate to determine current consumption in kilowatt-hours. If your bill shows 50,000 kWh annually at $0.12 per kWh, your current annual lighting cost is $6,000.
An LED retrofit typically reduces lighting energy consumption by 50 to 70 percent. Using a conservative 55 percent reduction, your new annual consumption drops to 22,500 kWh, cutting your bill to $2,700. That’s $3,300 in annual savings.
Occupancy sensors and smart controls add another 15 to 25 percent savings on top of the LED retrofit baseline. In this example, your total savings could reach $4,000 to $4,500 annually.
Utility rebates and lifecycle cost analysis
Many utilities offer rebates for LED retrofits. These rebates typically cover 20 to 50 percent of your retrofit project cost. Some programs offer accelerated rebates for projects that include occupancy sensors or smart controls. These rebates dramatically improve your payback timeline.
Your lifecycle cost should account for five factors: retrofit material cost, installation labor, utility rebates, energy savings over 10 years, and maintenance cost reduction.
A typical parking garage retrofit pays back in 3 to 6 years when utility rebates are factored in. After payback, every dollar of energy savings flows directly to your bottom line for the remaining 10 to 15 years of LED fixture lifespan.
Execute Installation and Verify Performance
Installation planning separates successful retrofits from painful ones. Your garage likely operates 24/7 or near-capacity during business hours. Disruptive installation creates safety risks and operational headaches.
Pre-installation planning and safety considerations
Schedule installation during low-occupancy periods if possible. Many garages coordinate LED retrofits during overnight hours or weekend periods.
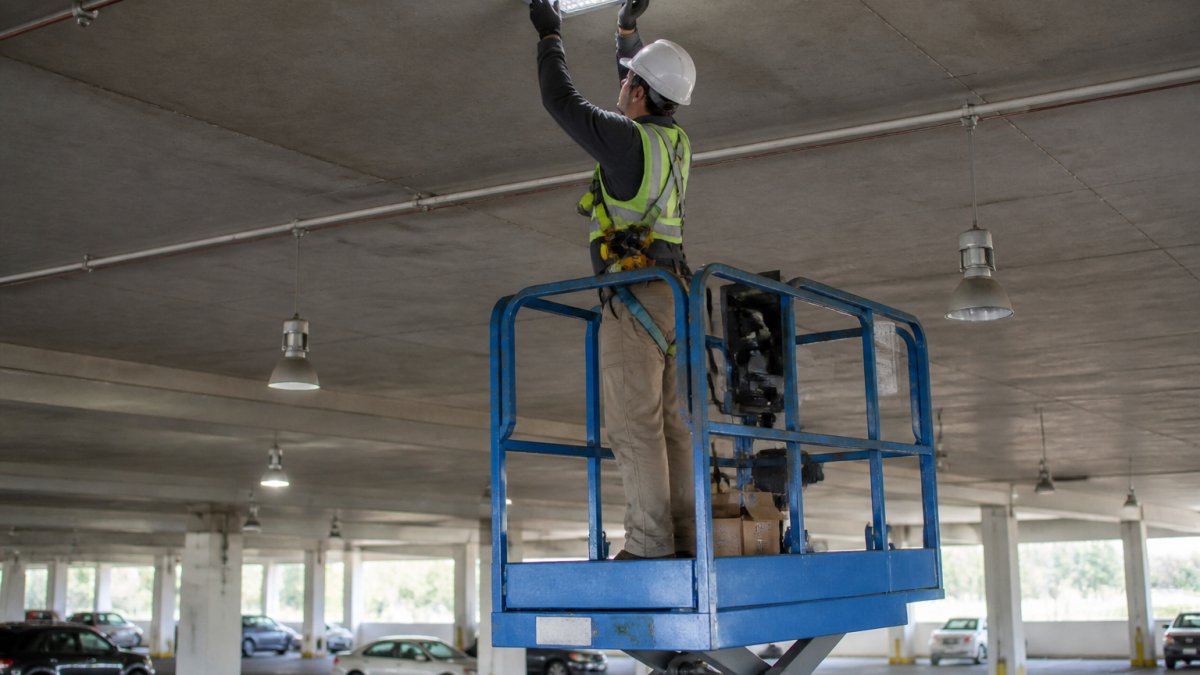
High-bay fixtures require lifts, scissor lifts, or boom lifts to reach mounting heights of 20 to 40 feet. Your installation crew needs proper fall protection equipment and training.
Pre-installation coordination with your facility team is essential. Communicate the work schedule, identify electrical disconnect points, confirm parking restrictions in work zones, and establish communication protocols for emergency situations.
Commissioning and post-retrofit verification
After installation, your retrofit contractor should commission the system by testing every fixture, verifying light output with a photometer, and confirming that controls and sensors operate correctly.
Request a final photometric report showing measured light levels across the garage. Compare these measurements to your pre-retrofit assessment and your design specifications.
Test occupancy sensors and smart controls through a full cycle.
Modernizing your parking garage lighting requires careful assessment, smart fixture selection, thoughtful design, and professional installation.
At NexVolt Energy Group, we handle every stage of this process, from assessing your current system and navigating utility rebate programs to designing your lighting layout and managing installation.
Get a free property assessment from NexVolt Energy Group today.
Frequently Asked Questions
How can I convert existing parking garage lights to LED?
Start by documenting your current fixtures, wattage, and light levels. Most conversions involve either installing LED retrofit kits into existing fixtures or replacing entire fixture housings with new LED units. Retrofit kits work if your existing fixtures are compatible; complete replacements offer better performance and longevity. Verify that your electrical drivers and wiring support the new LED system before installation begins.
What color temperature is best for parking garage lighting?
Most parking garages benefit from 4000K to 5000K color temperature, which provides clear visibility and security without excessive harshness. Some facilities prefer 5000K or 6000K for maximum clarity in safety-critical areas. Daylight temperatures (5000K+) improve visual acuity and reduce eye strain during extended exposure. Choose based on your facility’s security priorities and user comfort preferences.
Should parking garage LED lights use occupancy sensors?
Yes, occupancy sensors significantly reduce energy consumption in parking garages where usage varies by time of day. Sensors detect motion and automatically adjust lighting levels or turn lights off in unoccupied sections, cutting energy waste. Combined with smart controls and dimming, occupancy sensors can reduce overall lighting energy consumption by 30-50% compared to always-on systems, improving both energy savings and maintenance intervals.
How can I estimate energy savings from a parking garage LED retrofit?
Calculate current power consumption by multiplying fixture wattage by operating hours annually. LED retrofits typically reduce wattage by 40-60% compared to HID or metal halide systems. Multiply the wattage reduction by your local electricity rate to estimate annual savings. Factor in reduced maintenance costs from longer LED fixture lifespan and lower replacement frequency. Many facilities recover their retrofit investment within 3-5 years through energy and maintenance savings.