
Quick Summary
Daylight harvesting is a lighting control strategy that uses natural light from windows and skylights to reduce how much electric light a building needs. Sensors measure the daylight in a space and dim or switch off nearby fixtures when there is enough sunlight, then bring the lights back up as clouds or night reduce it.
- Sensors measure natural light in a zone and compare it to a target set by the building owner.
- Controllers dim or switch electric lights to make up the difference between daylight and the target.
- Smooth dimming needs dimmable fixtures; older fluorescent systems often only switch on and off.
- Sensors should view the work area, not the window, to avoid reading too much daylight.
- Measure daylight and set targets before commissioning, then verify on both clear and overcast days.
Table of Contents
- What Daylight Harvesting Is and Why It Saves Energy
- The Core Components: Sensors, Controllers and Dimmable Fixtures
- Daylight Sensor Placement and Choosing Open-Loop or Closed-Loop Control
- Step-by-Step: How a Daylight Harvesting System Is Set Up and Commissioned
- Daylight Harvesting Requirements, Codes and Accessibility
- Daylight Harvesting Energy Savings: How to Calculate and Measure Them
- Troubleshooting Common Daylight Harvesting Problems and Your Next Step With NexVolt
- Frequently Asked Questions
What Daylight Harvesting Is and Why It Saves Energy
Last Updated: November 12, 2026
Daylight harvesting is a lighting control strategy that uses natural light from windows and skylights to reduce how much electric light a building needs.
Electric lights often run at full power even when the sun is shining through the windows.
Here’s what a typical system does:
- Measures the natural light level in the space
- Compares that level to a target set by the building owner
- Dims or switches electric lights to make up the difference
Keep in mind that daylight harvesting only works well where daylight actually reaches. A windowless back room gets no benefit.
The Core Components: Sensors, Controllers and Dimmable Fixtures
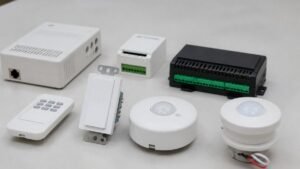
A working daylight harvesting system has three main parts. Each one has a clear job, and a weak link in any of them can cut the savings.
Light sensors (photocells) measure the amount of light in a zone.
Controllers compare the sensor reading to the target light level and send a signal to the fixtures.
Dimmable fixtures are the lights that actually respond.
Common mistakes to avoid:
- Using non-dimmable fixtures and expecting smooth control
- Mixing dimming drivers with incompatible controllers
- Skipping the sensor and relying on timers alone
Good components only help when they work together. Before installing anything, check that the sensors, controllers, and fixtures are compatible.
Daylight Sensor Placement and Choosing Open-Loop or Closed-Loop Control
Where you put the sensor matters as much as which sensor you buy.
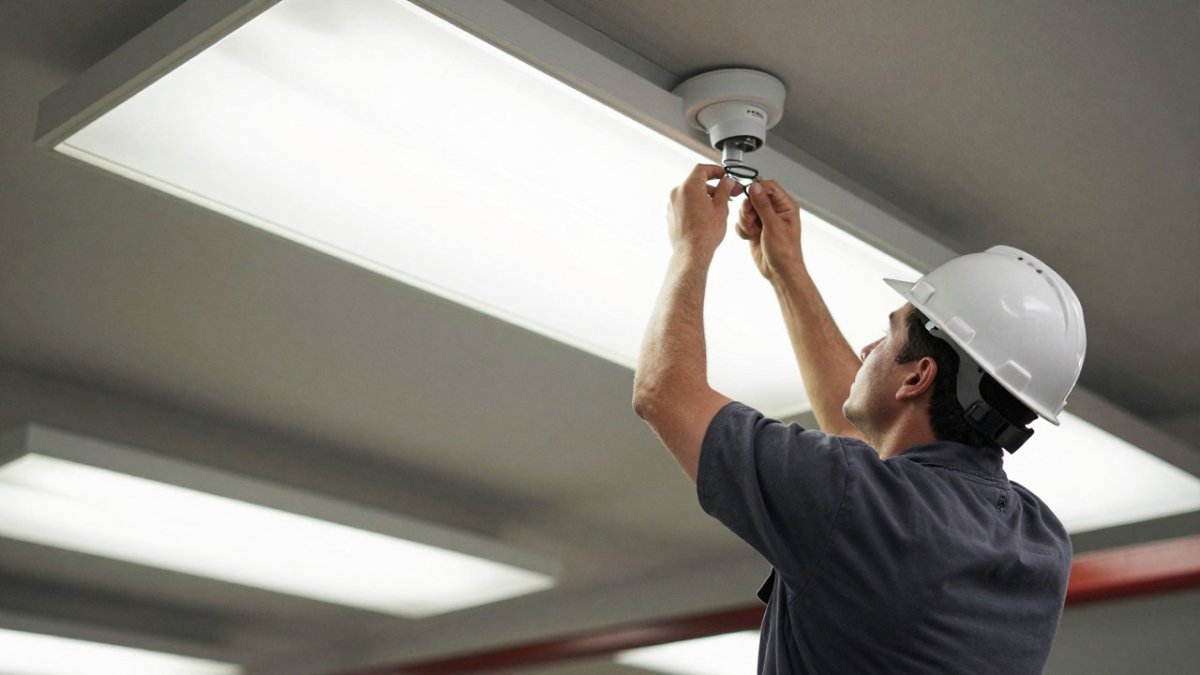
Placement rules that help:
- Mount the sensor where it sees the work area, not the window
- Keep it away from direct sun and light from electric fixtures
- Aim it so it reads the light the occupants actually use
Open-loop versus closed-loop control is the next decision. Both approaches dim lights based on daylight, but they handle the reading differently.
- Open-loop control senses light coming in from outside, usually at the window, and assumes it predicts the light on the work surface. It’s simpler and cheaper but less accurate if the room layout changes.
- Closed-loop control senses total light in the space, including electric light, and adjusts until the target level is reached. It costs more but holds a steady level more reliably.
A useful rule: choose closed-loop control when the room has varied furniture, shelving, or changing layouts. Open-loop control can work well in simple, fixed spaces with clear window exposure.
Step-by-Step: How a Daylight Harvesting System Is Set Up and Commissioned
Commissioning is where most daylight harvesting savings are won or lost. The sequence below follows the order experienced lighting-control technicians use, with the concrete checks that separate a working system from one that generates callbacks. For a full project walkthrough covering planning, controls, commissioning and verification, see a complete installation guide.
- Audit the space and map daylight. Walk the floor with a light meter at work-plane height (typically 30 inches for seated tasks). Record readings at the perimeter, mid-zone, and core on a clear day and an overcast day, noting window orientation, skylights, obstructions, and partitions that block daylight. This map becomes the basis for zoning.
- Define control zones by daylight similarity. Group fixtures that see roughly the same daylight at the same time; north- and south-facing window walls should not share a zone. Separate zones at each depth band where daylight drops by about half, often within the first 15 feet of a window and again beyond it. Core zones with no daylight should be on separate controls or excluded.
- Select the control method per zone. Choose open-loop or closed-loop based on sensor location and room variability, and document the choice for each zone.
- Install sensors and controllers. Mount photosensors so they view the work surface and electric light contribution, not the window. Keep sensors several feet from HVAC diffusers and fixtures that may spill light into them. Wire per the manufacturer’s diagrams and label every circuit and zone.
- Set target light levels and configure setpoints. Enter the design target for each zone, then configure deadband, ramp rate, and response delay (covered below).
- Calibrate and verify. Perform a functional test at multiple daylight conditions, document results, and hand over a settings record. Schedule a follow-up check after the first week and again after a full seasonal change.
Measuring Available Daylight and Setting Target Light Levels
Before touching the controller, measure the daylight each zone actually receives.
Set the target from the task requirement, not the fixture’s maximum output. Design targets should be set from the task requirement and confirmed against the applicable code and the owner’s program.
Watch out: many systems fail because the target was set from a catalog recommendation without measuring the daylight first. Measure, then set, then confirm with a meter at the work plane.
Configuring Deadband, Ramp Rate, and Response Delay
Three controller settings do most of the work in making a system behave well:
- Deadband is the tolerance around the target. With a 40-footcandle target and a 10 percent deadband, the controller only adjusts when the reading drifts outside roughly 36 to 44 footcandles. Too narrow causes constant hunting; too wide lets the space drift noticeably.
- Ramp rate controls how fast fixtures change output. Slow ramps (several seconds to a minute) avoid distracting transitions and reduce wear on dimming drivers; fast ramps suit only unoccupied spaces.
- Response delay is how long the controller waits before acting on a changed reading. A minute or more prevents reactions to passing clouds, headlights, or people walking past the sensor.
A common starting point is a 10 percent deadband, a ramp of 10 to 30 seconds, and a response delay of one to five minutes, adjusted to the space. Document the final values.
Calibrating and Verifying Performance
Calibration teaches the sensor what full daylight and zero daylight look like in that specific room.
Verify the system against a written checklist:
- Lights dim and brighten smoothly without flicker or visible stepping
- The work-plane light level stays within the deadband as daylight changes
- Manual override and occupancy functions still work
Run verification over several days, including at least one clear and one overcast day. Document results so the next technician can repeat the process, and schedule a seasonal recheck because daylight patterns shift through the year.
The commissioning sequence and the key settings that separate a working system from one that needs callbacks are summarised below.
| Setting | Typical starting value | Effect of getting it wrong |
|---|---|---|
| Deadband | 10 percent around target | Too narrow causes hunting; too wide lets light drift |
| Ramp rate | 10 to 30 seconds | Too fast is distracting; slow ramps reduce driver wear |
| Response delay | One to five minutes | Too short reacts to passing clouds or people |
| Work-plane height | 30 inches for seated tasks | Readings at the wrong height misstate daylight |
| Verification period | Several days, clear and overcast | One condition alone hides failures |
Daylight Harvesting Requirements, Codes and Accessibility
Daylight harvesting is not only an energy strategy; in many jurisdictions it is a code requirement for certain spaces. Commercial lighting requirements are set by energy codes that states and local jurisdictions adopt, often with their own amendments, so the first step on any project is to confirm which edition is in force locally (Commercial and Residential Building Energy Codes).
What the Energy Codes Typically Require
Energy codes vary by edition and jurisdiction, so verify the specific daylight-control, override and commissioning requirements against the edition your jurisdiction has adopted.
Demonstrating Compliance
Compliance is usually demonstrated through a combination of design documentation, a commissioning report, and inspection. Practical steps include:
- Identifying the code edition and the specific daylight-control provisions that apply to each space
- Showing controlled zones, sensor locations, and setpoints on the lighting plans
- Retaining the commissioning record, including calibration values and functional test results
Many jurisdictions also tie utility rebate eligibility to documented savings, so the same records often serve both code compliance and rebate applications.
Accessibility and Occupant Needs
Lighting changes should be gradual and predictable so people with low vision or sensory sensitivities are not startled by sudden brightness shifts. Smooth dimming, a reasonable deadband, and clear manual override options support that goal.
Consider these practical requirements:
- Confirm the code edition and any local amendments before design
- Keep manual override controls accessible and labeled
- Avoid abrupt light changes in high-traffic and egress areas
Watch out: a system that meets the energy code on paper can still fail inspection if the commissioning record is incomplete or if override controls are not accessible.
Daylight Harvesting Energy Savings: How to Calculate and Measure Them
Savings depend on the building, its daylight, and how the lights are used, so measure before and after installation rather than relying on a general percentage.
A simple way to estimate savings:
- Record current lighting wattage and annual operating hours
- Estimate the share of hours and zones where daylight can reduce output
- Multiply the reduced energy use by your electricity rate
To verify actual results, measure lighting energy use before and after installation, accounting for changes in occupancy and operating hours. This guide to verifying savings with a documented baseline explains how to set up those measurements.
Troubleshooting Common Daylight Harvesting Problems and Your Next Step With NexVolt
Most problems fall into a few patterns. Use this checklist when something goes wrong:
- Lights stay too dim: The sensor may be reading too much daylight. Check placement and recalibrate.
- Lights stay too bright: The target may be too high, or the sensor blocked. Lower the target or clear the obstruction.
- Lights flicker or cycle: Sensor and controller settings may conflict. Adjust the response time.
- Some zones react poorly: Zones may be grouped incorrectly. Regroup fixtures by daylight exposure.
When problems persist, a professional assessment often finds the cause quickly. NexVolt Energy Group offers a free property assessment for New Jersey facilities. If your facility is 25,000 square feet or larger, request a New Jersey commercial LED lighting assessment and we will review your lighting needs.
Frequently Asked Questions
What does daylight harvesting mean?
Daylight harvesting is a lighting control strategy that uses sensors to measure the natural light entering a space and then dims or switches the electric lights to make up the difference. When sunlight is strong near windows or skylights, the fixtures run at lower output or turn off. When clouds pass or the sun sets, the system raises the electric light back to the target level. The goal is to keep the space at a consistent, adequate light level while avoiding energy spent on lights that aren’t needed.
How much energy can daylight harvesting save?
Savings depend on how much daylight reaches the space, the hours of operation, the fixture types, and how the controls are set up. Results vary by building, so the most reliable figure comes from measuring your own facility’s before-and-after lighting energy use. NexVolt Energy Group can review your building and help you estimate potential savings. For current pricing or a quote, visit the NexVolt Energy Group website.
What is the difference between open-loop and closed-loop daylight sensing?
In an open-loop system, the sensor sits outside the controlled area or looks at incoming daylight, so it estimates light levels without measuring the result inside the space. In a closed-loop system, the sensor measures the light level in the zone it controls and adjusts the fixtures until that level matches the setpoint. Closed-loop control generally maintains a more accurate target light level, while open-loop designs can be simpler to install in some layouts.
Where should daylight sensors be placed?
Place sensors where they can read the daylight contribution in the zone they control, typically near the window or skylight but not in direct sun or aimed at a glare source. Each sensor should cover a distinct daylight zone so that fixtures near windows dim while fixtures farther inside stay on. Proper sensor placement and calibration are critical, because a poorly positioned sensor will either overdim the space or leave lights on unnecessarily.