Quick Summary
Installing LED lights in a high ceiling requires choosing fixtures for their beam angle and lumen output at the working plane, not the wattage on the box. Fixture spacing should be set so adjacent units overlap at about 3 feet above the floor. Safe lift access, fall protection and a lockout/tagout sequence are required before any work begins.
- Ask for the fixture’s photometric report to confirm light coverage at your mounting height.
- Set maximum fixture spacing by multiplying mounting height above the working plane by the spacing criterion.
- Check existing wiring, circuit capacity and mounting hardware before replacing old fixtures.
- Confirm the driver is compatible with your dimming protocol and supply voltage before ordering.
- Require written proof of fall protection training from any contractor working at height.
Table of Contents
- Why High Ceilings Need a Different LED Installation Approach
- Choosing LED Fixtures and Brightness for Ceiling Height
- Planning Fixture Layout and Placement at Height
- Safe Access, Tools, and Materials for High-Ceiling Installs
- Step-by-Step LED High Bay Installation
- Retrofitting Existing Fixtures: What to Check First
- What LED Light Installation Costs and How Rebates Affect It
- Scheduling Your Assessment and Next Steps With NexVolt
- Frequently Asked Questions
Why High Ceilings Need a Different LED Installation Approach
Last Updated: November 2, 2026
Installing LED lights in high ceilings is not a scaled-up office retrofit.
The core difference is distance. Light traveling 30 feet or more loses intensity and spreads wider, so fixture choice, beam angle, and mounting position must account for that drop.
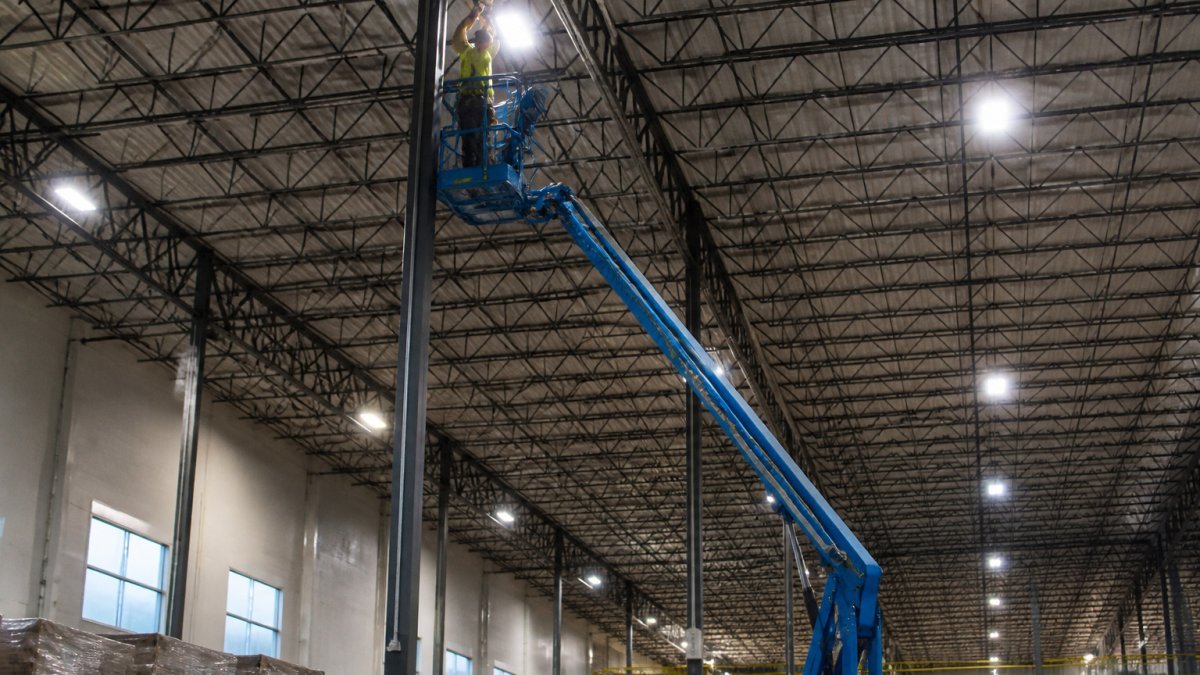
Access is the second difference. Every fixture swap at height requires lifts, fall protection, and a plan for moving tools and materials safely.
Finally, high-ceiling facilities usually run continuously, so installation sequencing and scheduling around shifts shape the project.
Choosing LED Fixtures and Brightness for Ceiling Height
Choosing the right fixture starts with mounting height and the lumen output needed at the floor, not the wattage on the box. Lumens measure total light emitted, while light reaching a work surface depends on distance and optics.
Compare lumen output and the fixture’s photometric data, which shows how light is distributed across the floor, and ask for the photometric report before committing.
Matching Beam Angle and Optics to Mounting Height
Beam angle determines how far light spreads and how much intensity reaches the floor. At 30 feet, a narrow beam concentrates light directly below the fixture, leaving gaps between fixtures; a wide beam spreads evenly but reduces peak intensity.
Match the optic to the mounting height and planned spacing. A fixture at 35 feet with a 60-degree beam covers a different footprint than the same fixture at 20 feet.
Lumen Targets for Warehouses, Retail, and Parking Garages
Lumen targets depend on the activity in the space. Warehouses with forklift traffic and picking need consistent, glare-controlled light across aisles. Retail stores need higher light levels on shelving and merchandise.
The Illuminating Engineering Society publishes recommended illuminance levels by space type, which many designers use as a baseline. Treat these as a starting point and confirm final targets against the specific tasks your facility performs, a lumen target that works for a storage aisle may be too low for a packing station.
Planning Fixture Layout and Placement at Height
Layout planning begins with a floor plan showing mounting height, fixture spacing, and the working plane where people need light, usually about 3 feet above the floor for racking and workstations, and 2.5 feet for desk-height tasks. Spacing is typically set so adjacent fixtures overlap at that plane. Wider spacing saves fixtures but creates dark bands; tighter spacing improves uniformity but raises cost.
The practical starting point is the spacing-to-mounting-height ratio, or spacing criterion (SC), published in most high-bay photometric reports and typically between 1.0 and 1.5 for high-ceiling work. Multiply the mounting height above the working plane by the SC to get maximum recommended center-to-center spacing. For a fixture 30 feet above a 3-foot working plane (27 feet effective height) with an SC of 1.2, maximum spacing is about 32 feet. That figure is a ceiling, not a target, most layouts land at 0.8 to 1.0 times the maximum to avoid dark bands between rows.
Placement also depends on obstructions. Racking, sprinkler heads, HVAC ducts, and crane rails affect where a fixture can hang and how light reaches the floor beneath them, so mark these on the plan before selecting positions. Keep fixtures at least 18 inches from sprinkler deflectors unless the sprinkler design allows closer spacing, and confirm clearance with the fire protection contractor.
A common mistake is placing fixtures to match the old layout rather than the new light requirement.
Ask the fixture manufacturer for an aisle-specific layout or a point-by-point calculation for your bay dimensions. Most will run the photometric layout at no cost, and the resulting foot-candle grid is far more reliable than spacing rules of thumb alone.
Safe Access, Tools, and Materials for High-Ceiling Installs
Safe access is the first decision on any high-ceiling job. For guidance on limiting operational disruption while work is underway at height, see this LED retrofit downtime mitigation guide.
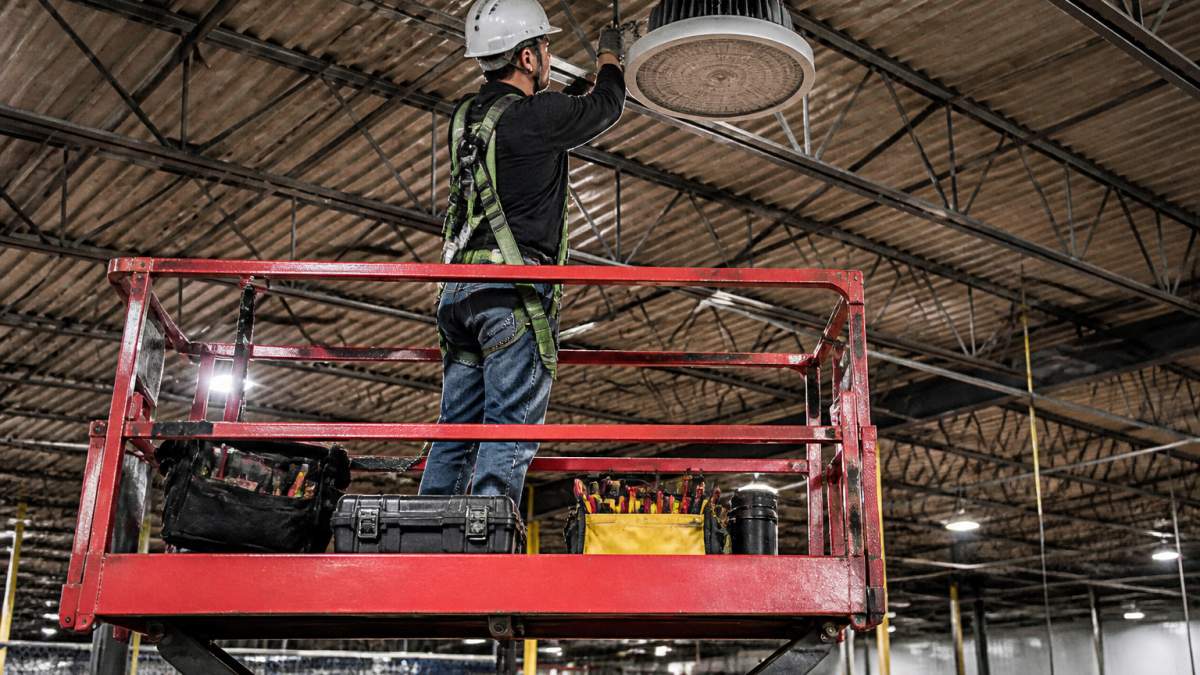
Fall protection is required whenever workers operate at height. In the United States, OSHA sets fall protection requirements for general industry and construction, including guardrails, personal fall arrest systems, and training.
The tool and material list for a typical high-bay install includes:
- Insulated tools rated for the electrical work involved
- A lift-mounted tool tray or tether system to keep tools from falling
- Voltage testers and lockout/tagout equipment
Step-by-Step LED High Bay Installation
A high-bay installation follows a repeatable sequence, though the details vary by fixture and facility. The general steps are:
Get a Free Property Assessment →
- Confirm the existing circuit, voltage, and breaker capacity, and shut off power to the work area with lockout/tagout.
- Remove the old fixture, lowering it with a secondary line to prevent drops.
- Inspect the mounting point and wiring for damage, corrosion, or overheating.
- Install the new mounting bracket and secondary safety cable.
- Connect the fixture wiring according to the manufacturer’s diagram, using the correct driver and grounding.
- Hang the fixture, verify the secondary cable is secure, and confirm the fixture is level and aligned.
- Restore power, test the fixture, and check its output against the layout plan.
- Document the fixture location and test results for the facility record.
Plan the sequence by bay so no area is left dark during a shift change. Stage materials at the start of each bay and keep the work area clear of pallets and equipment before lifts move in.
Wiring, Drivers, and Dimming Compatibility
The LED driver converts supply voltage to the current the LEDs require, and a driver/dimming mismatch is a common cause of flicker, buzzing, or premature failure.
Occupancy sensors and smart controls add another compatibility layer. Verify sensors and fixtures share a communication protocol before installation, and test the full control sequence on a single fixture before rolling out the whole bay.
The sequence below summarises the installation steps covered in this section.
| Step | What to do | Timing note |
|---|---|---|
| 1 | Confirm circuit and breaker capacity; lock out power | Before any work |
| 2 | Remove old fixture using a secondary line | During removal |
| 3 | Inspect mounting point and wiring for damage | Before new hardware |
| 4 | Install new bracket and secondary safety cable | Before hanging |
| 5 | Connect wiring per manufacturer diagram | Correct driver and grounding |
| 6 | Hang fixture; confirm cable is secure and level | Check alignment |
| 7 | Restore power; test output against layout plan | Compare to plan |
| 8 | Document location and test results | For facility record |
Retrofitting Existing Fixtures: What to Check First
Before replacing old fixtures, check existing wiring and mounting points. Older buildings often have undersized circuits, degraded insulation, or mounting hardware that will not support modern fixtures.
Check the ballast or driver type in the old fixtures as well. Some systems can be retrofitted by replacing only the lamp, while others require full fixture replacement. The three common paths are:
- Lamp-and-ballast retrofit (fluorescent only): Replace the fluorescent lamps with LED tubes and either keep the existing ballast (ballast-compatible tubes) or bypass it (direct-wire tubes). Direct-wire is more efficient and removes a failure point, but it requires rewiring the fixture and may affect the fixture’s listing. Confirm the tube is listed for the fixture type and that local inspection will accept the modification.
- Retrofit kit: Replace the lamp, ballast, and optical assembly inside the existing housing. Kits are listed for specific fixture models, preserve the existing mounting and wiring, and are usually the lowest-labor path when the housing is in good condition. Verify the kit is listed by a recognized testing laboratory for that housing.
- Full fixture replacement: Replace the entire luminaire. This is the right call when the housing is corroded, the lens is yellowed or cracked, the mounting hardware is degraded, or the existing fixture is not listed for the environment (for example, a damp or wet location). It is also the path that captures the full optical and thermal benefits of a modern high bay.
Reviewing the existing system first prevents wasted spending on the wrong approach. A retrofit kit on a failing housing is money spent twice; a full replacement where a kit would do is money left on the table.
Do not assume a retrofit kit preserves the fixture’s UL listing. Many kits are listed only for specific housings, and an unlisted combination can fail inspection and may void the fixture warranty. Check the kit’s listing label against the housing model before ordering.
Two more checks belong on the pre-retrofit list. First, confirm the existing mounting structure can carry the new fixture weight, LED high bays are often lighter than the metal halide fixtures they replace, but not always, and the bracket and structure must be rated for the load. Second, check the ceiling plenum and clearance around the fixture. High-bay LEDs need airflow for thermal management, and a fixture crammed against insulation or ductwork will run hotter and lose life. If the old fixture was recessed or tightly enclosed, confirm the new fixture is rated for that mounting condition.
Finally, document what you find.
What LED Light Installation Costs and How Rebates Affect It
Installation cost depends on fixture count, mounting height, lift and labor required, controls specified, and any electrical work the building needs. Pricing depends on these factors, so request a quote from NexVolt Energy Group for current pricing after a facility assessment.
Utility rebates can reduce net project cost, but eligibility, amounts, and approval timing vary by program and project type. You can explore New Jersey utility lighting rebate programs to see which ones may apply to your facility.
Scheduling Your Assessment and Next Steps With NexVolt
The most useful first step is a facility assessment. For a high-ceiling facility, that information turns a general idea into a workable project plan.
NexVolt Energy Group serves commercial and industrial facilities across New Jersey. Check whether your location is in NexVolt’s commercial LED lighting service areas before you book an assessment. If your facility has large high-ceiling spaces, you can request a New Jersey commercial LED lighting assessment and share your facility details so we can review lighting needs.
Start with the assessment, then move to a written scope and a rebate review. That sequence keeps the project on track and gives your finance team the detail it needs to approve the work.
Frequently Asked Questions
How do you install LED lights in a high ceiling?
Start with a site assessment that measures mounting height, existing wiring, and fixture weight. Power off and lock out the circuit, then use a scissor lift or aerial work platform rated for the height rather than ladders. Mount the fixture bracket or hanging hardware, connect the driver wiring per the manufacturer’s diagram, and verify voltage before energizing. Test each fixture at the ceiling before closing out the job, and document placement for future maintenance.
What type of LED lights work best for high ceilings?
High bay LED fixtures are designed for mounting heights typically above 20 feet and use optics that focus light downward to reach the floor. Look for fixtures with beam angles matched to your mounting height and spacing, lumen output sufficient for your task level, and a driver rated for your ceiling temperature. For warehouses and distribution centers, fixtures with high lumens per watt and a service life rated at L70 or higher reduce replacement frequency. Confirm that the fixture is listed by UL or ETL for use in your facility type.
How many lumens do I need for a high-ceiling room?
Lumen needs depend on the space and task. Warehouse aisles and storage areas often target lower illuminance than picking or inspection zones, while retail and parking areas have their own recommended levels. Divide the target footcandle level by the square footage to estimate total lumens, then account for light loss from fixture depreciation and dirt. Because pricing and fixture models vary, contact NexVolt Energy Group to discuss the right output for your facility.
How much does it cost to install LED lights in a high ceiling?
Cost depends on fixture count, mounting height, access equipment, electrical work needed, and whether you are replacing existing fixtures or installing new circuits. Labor for elevated work usually adds more than ground-level installs because of lift rental and safety requirements. Utility rebates may offset part of the project, and program availability varies by utility and building type. Pricing depends on the factors above, so visit the NexVolt Energy Group website to request a quote for your facility.
Can you install recessed LED lights without attic access?
In many commercial buildings, recessed or surface-mounted high bay fixtures are installed from below, so attic access is not required. Residential-style recessed retrofits sometimes require access above the ceiling to reach junction boxes or secure new housings. Check the ceiling type, plenum rules, and fire-rated assembly requirements before cutting openings. A site assessment identifies whether the installation can be completed from below or requires specialized access.
How can occupancy sensors improve high-ceiling lighting efficiency?
Occupancy sensors reduce energy use by dimming or switching off fixtures in areas that are empty, which matters most in aisles, storage zones, and parking garages that sit idle for long periods. In high-ceiling spaces, sensor placement and detection range must account for mounting height so that motion is detected reliably at floor level. Pairing sensors with high bay fixtures can reduce lighting runtime substantially, depending on occupancy patterns. Sensor settings should be tested after installation and adjusted to avoid nuisance shutoffs.