
Last Updated: November 6, 2026
Quick Summary
A led retrofit installation replaces a building’s existing lighting with LED fixtures, lamps or kits while keeping much of the existing infrastructure. The process runs in order: audit the lighting, choose the retrofit approach, plan phasing, install safely, then commission and verify the results.
- Every project starts with a commercial lighting audit recording fixture wattage, lamp type, mounting height and operating hours.
- Choose among retrofit kits, direct lamp replacement or full fixture replacement based on the existing fixtures and housings.
- Direct lamp replacement on aging ballasts is a common mistake, since the ballast then becomes the failure point.
- Verify commissioning with a grid-based foot-candle survey against the target illumination levels set during design.
- Confirm utility rebate eligibility and pre-approval with your utility before ordering fixtures.
Table of Contents
- What a Commercial LED Retrofit Involves and Why Facilities Undertake One
- Step 1: Conducting a Commercial Lighting Audit and Facility Walkthrough
- Step 2: Choosing the Retrofit Approach and Selecting LED Fixtures
- Step 3: LED Retrofit Project Planning, Phasing, and Business Continuity
- Step 4: Electrical Safety, Permitting, Installation, and Disposal
- Commercial LED Retrofit Cost, Payback, and Utility Rebates
- Commissioning, Controls Testing, and Scheduling Your Retrofit With NexVolt
- Frequently Asked Questions
What a Commercial LED Retrofit Involves and Why Facilities Undertake One
A commercial LED retrofit, sometimes called a led retrofit installation, replaces the existing lighting in a building with LED fixtures, lamps or kits while keeping much of the existing infrastructure.
The process is not just a bulb swap. It touches electrical work, controls, scheduling and, increasingly, utility incentive paperwork.
Below, we walk through the process in order: audit, approach and fixture selection, planning, installation and disposal, then cost and commissioning. Each stage builds on the last.
Step 1: Conducting a Commercial Lighting Audit and Facility Walkthrough
Every led retrofit installation starts with a commercial lighting audit. For a detailed guide to the audit process itself, see our industrial facility lighting audit process article. You can compare your approach against our commercial lighting energy audit guide.
During the facility walkthrough, record each fixture zone separately. Note whether a space runs continuously, follows a shift schedule or depends on occupancy.
Check the electrical condition as well. Ballast type, circuit loading and wiring age all affect which retrofit options are viable.
Finally, measure or estimate existing illumination levels at task height. This baseline is what allows you to verify, later, that the new system delivers adequate light rather than simply less energy use.
Step 2: Choosing the Retrofit Approach and Selecting LED Fixtures
The choice of approach determines most of the labor, downtime and cost. There are three main routes, and the right one depends on the existing fixtures and how much of the housing is worth keeping.
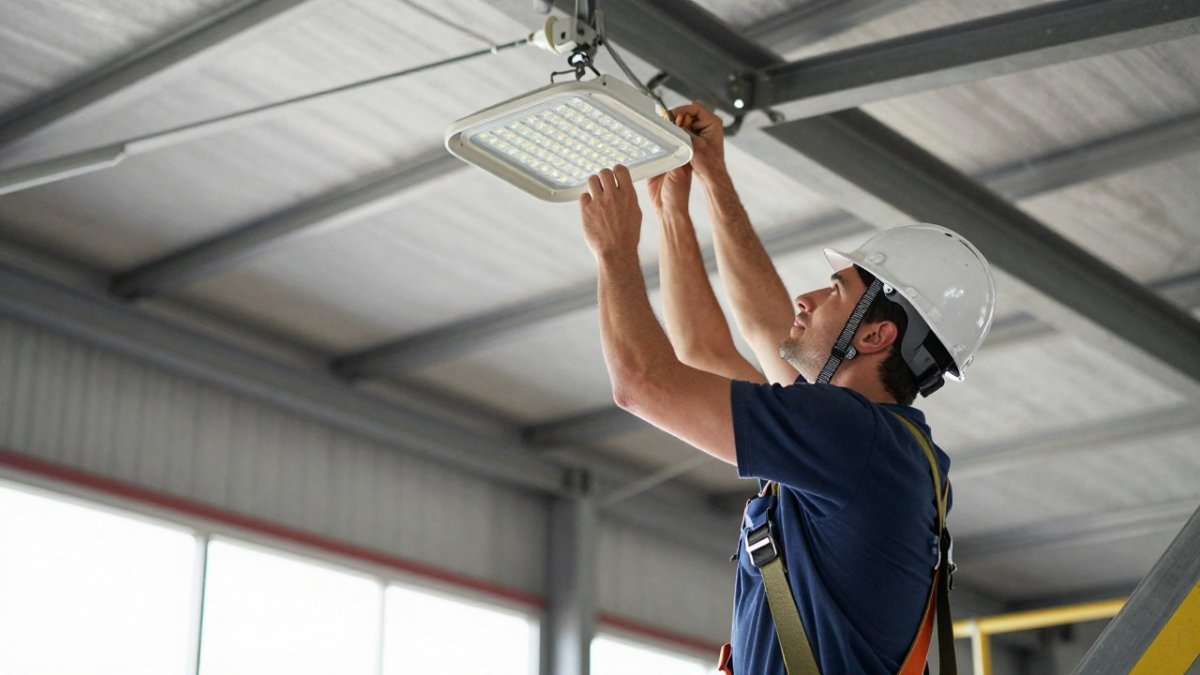
Retrofit kits, direct lamp replacement, or full fixture replacement
- Retrofit kits convert an existing fixture housing by swapping in an LED module and driver. They suit fixtures with sound housings and good reflectors.
- Direct lamp replacement uses LED tubes that fit existing sockets. This is the fastest option, but it depends on whether the ballast is removed or bypassed, and that decision carries electrical and safety implications.
- Full fixture replacement installs new LED fixtures. It costs more upfront but gives the best control over light distribution, warranty coverage and long-term reliability.
A common mistake is choosing direct lamp replacement on aging ballasts. The ballast then becomes the failure point, and the savings erode quickly.
Photometric design and acceptance criteria
Specify fixtures using photometric data, not wattage alone. Ask for the lumen output, color temperature and light distribution pattern at the mounting height in your space.
Define acceptance criteria before purchase. Write down target illumination levels for each zone and the method used to verify them, such as a foot-candle survey on a grid. This turns commissioning into a pass-or-fail check rather than a judgment call.
Step 3: LED Retrofit Project Planning, Phasing, and Business Continuity
Planning is where most schedules succeed or fail.
Build a phased plan. Divide the facility into zones and sequence the work so that each zone can be completed in a single shift or a planned window.
Coordinate with operations staff early. Confirm blackout windows, access routes for lifts and any restricted areas.
Set a realistic installation schedule with contingency time. Electrical surprises, delayed deliveries and inspection scheduling all extend timelines, and a plan with no buffer usually slips.
Step 4: Electrical Safety, Permitting, Installation, and Disposal
Installation must follow electrical safety practice.
Most commercial retrofits require a licensed electrician and may require an electrical permit from the local authority having jurisdiction. Check local requirements before work begins.
During installation, label new circuits and update panel schedules. Keep the removed fixtures sorted by type, since many contain ballasts and lamps that require specific handling.
Disposal is part of the project. Fluorescent lamps and some ballasts can contain hazardous materials in older equipment, so disposal should follow applicable federal and state waste rules (the EPA).
The main safety, permitting and disposal requirements for a retrofit are summarised below.
Get a Free Property Assessment →
| Stage | Requirement | Note |
|---|---|---|
| Circuits before work | Lock out and tag out | Verify de-energized with a tester |
| Work at height | Fall protection | High-bay work is a hazard point |
| Electrical work | Licensed electrician | Often needs local permit |
| Permit check | Local authority having jurisdiction | Confirm before work begins |
| Removed fixtures | Sort by type | Ballasts and lamps need specific handling |
| Disposal | Licensed waste handler | Keep disposal documentation |
Commercial LED Retrofit Cost, Payback, and Utility Rebates
Cost is where retrofit proposals get approved or rejected, so the section that matters is not a price list but a defensible method. A finance reviewer will generally accept a payback estimate only if every input is traceable to the audit, a utility bill or a vendor quote.
What drives installed cost
Installed cost is the sum of four buckets: fixtures, lamps or kits; electrical labor and any circuit modifications; controls hardware and commissioning; and access equipment such as lifts or scaffolding for high-bay work. The retrofit approach chosen in Step 2 shifts the mix. Direct lamp replacement keeps material cost low but may leave aging ballasts in place, while full fixture replacement raises material cost and lowers long-term maintenance. High-ceiling warehouse work is labor-dominated because lift time, not fixture price, sets the pace. Because quantities, access conditions and delivery dates vary by site, request a site-specific quote rather than relying on general figures.
A transparent payback method
Use a simple, repeatable formula and show the inputs:
- Baseline energy use. Multiply existing fixture wattage (including ballast losses) by operating hours and fixture count, then divide by 1,000 to get annual kWh.
- Post-retrofit energy use. Repeat with the new wattage, adding any controls-driven hours reduction from occupancy sensing or scheduling.
- Annual energy savings. Subtract post-retrofit kWh from baseline kWh and multiply by the facility’s blended utility rate in dollars per kWh.
- Annual maintenance savings. Count avoided lamp and ballast replacements, lift rentals and labor hours at your own service rates.
- Net installed cost. Take the quoted installed cost and subtract confirmed utility incentives.
- Simple payback. Divide net installed cost by total annual savings (energy plus maintenance).
A worked pattern makes this concrete without inventing site numbers: if a zone’s baseline is 100,000 kWh per year and the retrofit plus controls cuts it to 55,000 kWh, the 45,000 kWh difference at a blended rate of $0.12 per kWh yields $5,400 in annual energy savings.
Watch out: payback estimates that use nameplate wattage without ballast losses, or that assume 24/7 operation for a space that runs one shift, routinely overstate savings and fail finance review.
Utility rebates and incentives
Utility rebates can reduce net cost, but programs vary by utility and state, and eligibility often depends on pre-approval before work begins. Confirm the program rules, required documentation and deadlines with your electric utility before ordering fixtures. Common requirements include a pre-installation baseline, fixture cut sheets, and post-installation verification. Rebate paperwork can be handled with NexVolt Energy Group’s utility rebate program assistance, but the eligibility decisions rest with the utility.
Beyond simple payback
Simple payback ignores equipment life and energy-price changes. For a fuller picture, compare lifecycle cost over the expected service life, factoring in replacement intervals for lamps and drivers, and note that LED fixtures typically carry longer warranties than the fluorescent equipment they replace. Present both simple payback and lifecycle cost so decision-makers can weigh cash flow against long-term value.
Commissioning, Controls Testing, and Scheduling Your Retrofit With NexVolt
Commissioning is the stage that turns a finished installation into a verified system. It has two halves: confirming the light delivered matches the acceptance criteria set during design, and confirming the controls behave the way the savings estimate assumed.
Verifying light against acceptance criteria
Return to the zone-by-zone targets written down in Step 2 and measure against them. A practical procedure is a grid-based foot-candle survey at task height, with readings taken at consistent spacing across each zone and recorded on a floor plan. Compare the results to the target illuminance and check uniformity across the grid rather than only at the brightest point.
Controls commissioning and integration
Controls deserve their own test sequence, because a sensor that is mounted wrong or set with the wrong timeout will frustrate occupants and erode the savings you planned for.
- Sensor placement. Confirm occupancy sensors see the areas people actually use and are not blocked by shelving, racking or partitions. Mounting height and coverage pattern should match the manufacturer’s published data for the space.
- Dimming compatibility. Verify that dimmers, drivers and controls are compatible and that the full dimming range works without flicker or drop-out.
- Control zoning. Check that zones follow how the space is used, so that a single occupant does not light an entire warehouse aisle or an empty conference room stays dark.
Watch out: sensors set with a very short timeout save energy on paper but generate nuisance shutoffs in spaces where people sit still, and the resulting complaints often lead to controls being disabled altogether.
Documentation and handover
Compile a commissioning record that includes the measured illuminance results, controls settings by zone, updated panel schedules and circuit labels, and warranty information. This record is what supports rebate verification, future maintenance and any warranty claim.
Scheduling your retrofit with NexVolt
Once you are ready to move forward, you can request a free property assessment through NexVolt Energy Group. Our page on how to book a commercial lighting energy assessment explains the steps.
After installation, verify the energy savings against your baseline. Our guide on how to verify energy savings after a commercial lighting retrofit explains the measurement steps. For commercial lighting energy audits in more depth, see our Commercial Lighting Energy Audit guide, and for the walkthrough process itself, see the Industrial Facility Lighting Audit Process guide.
Frequently Asked Questions
What are the steps in a commercial LED retrofit?
A commercial LED retrofit typically moves through a lighting audit and facility walkthrough, selection of the retrofit approach and fixtures, project planning and scheduling, electrical safety checks and power shutoff, installation and removal of old fixtures, testing and adjustment, and commissioning of any controls. Each stage builds on the previous one. Skipping the audit or the photometric check is the most common reason projects end up with dark spots, glare, or fixtures that do not fit the existing housings. Facilities that document each step gain a clear record for rebate applications and future maintenance.
How do you assess a commercial building before an LED retrofit?
Start with a commercial lighting audit that inventories every existing fixture by type, lamp, wattage, mounting height, and location, and records the hours each area operates. Measure current illumination levels where possible and compare them against the recommended levels for each space. The audit should also note the condition of wiring, ballasts, and mounting hardware, since these determine whether a retrofit kit or full fixture replacement is the better path. Review utility bills to establish a baseline energy consumption figure for later savings comparisons.
Can a commercial LED retrofit be completed while a facility is operating?
In most cases yes, but it depends on the facility layout and operating schedule. Projects are usually phased by zone so that work in one aisle or production area does not stop operations elsewhere. Installers often schedule work during off-shift hours or weekends, and temporary task lighting can keep work areas safe. A written installation schedule that is agreed with facility operations before work begins reduces disruption and prevents surprises on the production floor.
How are lighting controls tested after an LED retrofit?
Controls commissioning checks that occupancy sensors, daylight harvesting, dimming, and any scheduling systems respond as designed. Testers walk each zone, confirm sensor coverage and time-out settings, verify dimming levels against the design, and document the results. Adjustments are made to sensitivity and delay settings where sensors trigger too often or too late. Keeping a signed commissioning record gives facility managers a reference for future troubleshooting and warranty claims.
How do you choose the right LED fixtures for a commercial building?
Match fixture output, color temperature, beam distribution, and mounting type to the space. High-bay areas often need fixtures with beam patterns designed for their mounting height, while offices and retail spaces benefit from uniform, glare-controlled distribution. Confirm electrical compatibility with existing wiring and any dimming infrastructure, and request photometric data from the manufacturer so the design can be checked against the target illumination levels. Warranty length and the manufacturer’s support record also matter for long-term maintenance costs.
What should a commercial LED retrofit installation plan include?
A solid plan lists the scope by zone, the retrofit approach for each fixture type, the installation sequence and schedule, the electrical safety and power shutoff procedures, permit requirements, disposal arrangements for old ballasts and lamps, the acceptance criteria, and the commissioning steps. It should also identify who is responsible for any pre-existing electrical repairs. Including these details upfront makes budgeting and rebate paperwork much easier to manage.
How long does a commercial LED retrofit installation take?
Duration depends on the number of fixtures, the access conditions, and whether work is phased around operations. A small office or retail space can often be completed in days, while a large warehouse with high-bay fixtures may take several weeks. Elevated work, such as fixtures mounted 30 feet or more above the floor, requires lift scheduling and adds time. A detailed project timeline with phases and milestones is the most reliable way to estimate duration for a specific facility.
How can facility managers estimate savings from a commercial LED retrofit?
Estimate savings by comparing the wattage of existing fixtures and their operating hours with the wattage and hours of the proposed LED fixtures, then multiplying by the local electricity rate. Add reduced maintenance costs, such as fewer lamp replacements and lower labor, using the facility’s current replacement records. Subtract any utility rebates to find the net project cost. Payback period is the net cost divided by annual savings. Savings estimates should be reviewed against actual utility bills after installation to confirm performance.