
Table of Contents
- Why Parking Garage Lighting Efficiency Matters
- Step 1: Audit Your Current Lighting System and Energy Consumption
- Step 2: Meet Parking Garage Lighting Requirements and Code Compliance
- Step 3: Install LED Fixtures and Plan Fixture Placement
- Step 4: Deploy Parking Garage Occupancy Sensors and Motion Detection
- Step 5: Add Dimming Controls and Daylight Harvesting
- Calculating Parking Garage Lighting Energy Savings and Payback
- Step 6: Establish Parking Garage Lighting Maintenance and Monitoring
- Frequently Asked Questions
Last Updated: October 5, 2026
Why Parking Garage Lighting Efficiency Matters
Parking garage lighting efficiency is one of the fastest ways to cut operating costs while improving safety and visibility.
The math is simple. A typical parking garage uses metal halide or incandescent fixtures that consume far more power than modern LED alternatives.
Here’s what makes this worth fixing now: LED retrofits paired with occupancy sensors and smart controls can cut your lighting energy consumption by half or more. The payback happens quickly, especially when you factor in utility rebates.
The process is straightforward, and we handle everything from the initial audit through installation and utility rebate coordination. Below, we’ll walk you through each step to help you understand what a lighting efficiency upgrade actually involves.
Step 1: Audit Your Current Lighting System and Energy Consumption
Before you retrofit anything, you need baseline data. An audit tells you exactly what you’re working with and where the biggest energy waste lives.
Measure illuminance and lumen output across zones
Start by measuring light levels in different areas of your garage. Use a light meter to check illuminance in foot-candles across general parking areas, stairwells, and entry points. Document which zones are over-lit and which are under-lit. Uneven lighting often means some sections run at higher wattage than necessary.
Check the lumen output of your existing fixtures. If you have metal halide fixtures, they typically produce 50,000 to 150,000 lumens depending on wattage. Record the fixture count and wattage in each zone. This data becomes your comparison baseline once you design the LED replacement layout.
Document fixture types and wattage
Walk your garage systematically. Note every fixture type: metal halide, incandescent, fluorescent, or any mix. Record the wattage of each. Most older parking garages have a hodgepodge of different fixtures installed over time, which complicates maintenance and wastes energy.
Photograph fixture locations, especially high-bay installations. If you have fixtures 30+ feet up, that’s important information for installation planning later. Note any fixtures that flicker, dim, or show signs of age.
Create a simple spreadsheet with zone, fixture type, wattage, quantity, and condition. This becomes your retrofit specification document.
Step 2: Meet Parking Garage Lighting Requirements and Code Compliance
Parking garage lighting requirements exist for safety and visibility. You can’t just install whatever you want, codes set minimum illuminance levels and color rendering standards.
General lighting, task lighting, and layered lighting design
General lighting covers the whole garage floor and provides baseline visibility.
Task lighting focuses on high-activity zones: entrances, stairwells, elevators, and payment booths. These areas typically need 30 to 50 foot-candles for safe navigation and security.
Layered lighting combines both. You use lower general illumination in open parking zones and brighter task lighting at transitions and high-traffic points.
When you retrofit, design your LED layout to match these layered zones. Don’t just swap fixtures one-for-one. Use the retrofit as an opportunity to improve uniformity and reduce wasted light.
Color temperature and color rendering for visibility
LED color temperature matters more than most people realize. Cooler color temperatures (4000K to 5000K) improve visibility in parking garages because they enhance contrast and make details clearer. Warmer temperatures (3000K) feel more comfortable but reduce visual acuity.
Color rendering index (CRI) should be at least 70 for parking garages, though 80+ is better. Higher CRI makes it easier to spot hazards and recognize faces for security purposes.
Specify your LED retrofit with these standards in mind. The right color temperature and CRI improve both safety and energy efficiency compared to older metal halide fixtures.
Step 3: Install LED Fixtures and Plan Fixture Placement
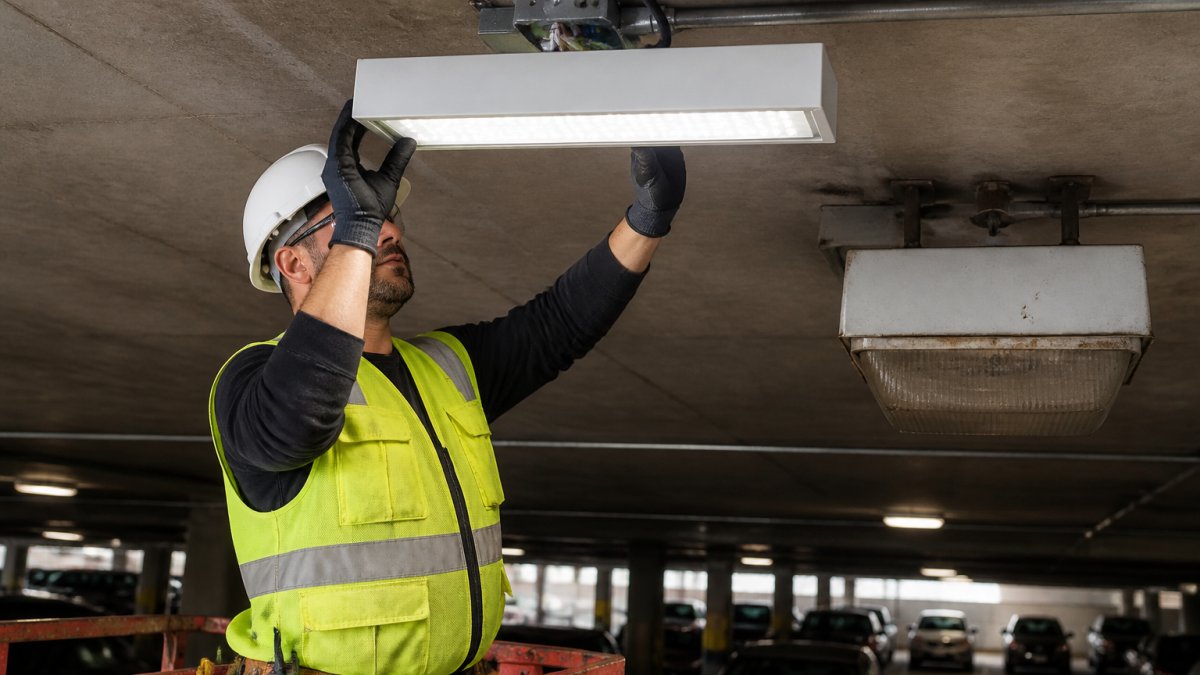
LED installation is where the real transformation happens. Modern LED luminaires use a fraction of the energy of metal halide while delivering better light quality and longer lifespan.
Replace metal halide and incandescent bulbs with LEDs
LED fixtures designed for parking garages come in several styles. High-bay LED luminaires work for garages with ceilings 20+ feet high. Wall-mount LEDs work for lower ceilings or perimeter lighting.
The efficiency gain is dramatic. A 150-watt metal halide fixture typically converts to a 40 to 60-watt LED with equal or better light output. That’s a 60% to 70% reduction in energy per fixture.
LED fixtures also generate less heat, which reduces cooling load in enclosed garages.
Optimize lighting layout for uniform illumination and reduced glare
Don’t just replace fixtures one-for-one in their old locations. Use the retrofit to redesign the layout for better uniformity. Uneven lighting creates dark spots that feel unsafe and waste energy in over-lit areas.
Calculate the spacing and mounting height needed for your LED fixtures. Proper spacing reduces glare and hot spots. A well-designed layout uses fewer fixtures overall while improving visibility.
Aim for uniformity ratios (average illuminance divided by minimum illuminance) of 3:1 or better. This means no zone is dramatically darker than its neighbors.
Step 4: Deploy Parking Garage Occupancy Sensors and Motion Detection
Occupancy sensors are where parking garage lighting efficiency really pays off. They cut wasted light in empty sections dramatically.
How occupancy sensors reduce wasted light in unused areas
Parking garages sit empty most of the time. A garage with 200 spaces might have 30 cars on a Tuesday morning. Without controls, you’re lighting the whole structure for a handful of users.
Occupancy sensors detect motion and presence. When a zone is empty, lights dim to a minimal level or turn off entirely. When motion is detected, they return to full brightness.
Get a Free Property Assessment →
Motion sensors work best in zones: a section of the garage, a stairwell, or a corridor. Each zone has its own sensor and control. Larger garages benefit from multiple sensors and zones.
Commissioning and tuning sensor sensitivity
Installation isn’t the end. Sensors need commissioning: adjusting sensitivity, timeout duration, and dim levels to match your garage’s actual use patterns.
Set the timeout (how long the light stays on after motion stops) based on typical dwell time. For a parking garage, 10 to 15 minutes is common. Adjust sensitivity so the sensor doesn’t trigger on passing cars or wind-blown debris.
Test the system over several days. Watch for false triggers or zones that stay dark too long. Fine-tune settings until the system balances occupancy response with user expectations. This tuning step is often overlooked but critical for long-term satisfaction.
Step 5: Add Dimming Controls and Daylight Harvesting
Beyond occupancy sensors, dimming and daylight harvesting squeeze even more efficiency from your lighting system.
Ambient-light sensors detect natural light and adjust LED brightness accordingly. In parking garages, this applies mainly to entry ramps and perimeter areas where daylight enters. During daytime, the system dims LEDs to compensate for natural light.
Reduced light levels during off-peak hours also work well in 24/7 garages. Late-night periods often need less illumination than daytime.
Dimming controls integrate with occupancy sensors. When motion is detected, lights return to full brightness. When zones are empty, they dim to minimal levels. This layered approach maximizes energy savings.
Calculating Parking Garage Lighting Energy Savings and Payback
Energy savings are real, but you need to calculate them properly to justify the investment and track results.
Total cost of ownership and maintenance cycle reduction
Start with your current annual energy cost for lighting. Multiply your total fixture wattage by operating hours and your local electricity rate. If you run 200 kW of lighting 8,760 hours per year at $0.12 per kilowatt-hour, that’s about $210,000 annually.
An LED retrofit cutting consumption by 60% saves $126,000 per year in energy alone. Add in maintenance savings: fewer bulb replacements, ballast repairs, and labor hours. LED fixtures need maintenance far less often, so your maintenance cycle stretches from quarterly or semi-annual visits to annual or biennial checks.
Maintenance cost reduction typically runs 40% to 70% depending on your current maintenance frequency and labor rates. In a large garage with high maintenance overhead, this becomes a significant second source of savings.
Utility rebates and upfront cost recovery
Most utilities offer rebates for LED lighting upgrades and occupancy sensor installations. Rebate amounts vary by region and utility, but they typically cover 20% to 40% of project costs.
Check with your local utility for available rebates. Some programs require pre-approval; others reimburse after installation. Many utilities have dedicated energy efficiency programs for commercial properties.
When you factor in energy savings, maintenance reduction, and rebates, most parking garage lighting retrofits pay for themselves within 2 to 4 years. After that, every year is pure savings.
Step 6: Establish Parking Garage Lighting Maintenance and Monitoring
A successful retrofit doesn’t end at installation. Ongoing maintenance and performance monitoring keep your system running efficiently.
Fixture lifespan and reduced maintenance burden
LED fixtures last 25,000 to 50,000 hours (Purchasing Energy-Efficient Light Bulbs). At 8,760 hours per year, that’s roughly 3 to 6 years of continuous operation before end-of-life.
Maintenance burden drops dramatically. You won’t need quarterly ballast checks or frequent bulb replacements. Instead, schedule annual inspections to verify light levels and check sensor function. Replace fixtures only as they reach end-of-life or if damage occurs.
Ongoing performance verification and control commissioning
After the first few months of operation, verify that your energy savings match projections. Check utility bills to confirm consumption decreased as expected.
Recommission controls periodically. Sensor sensitivity drifts over time. Dust and dirt can reduce sensor responsiveness. Clean sensors annually and re-test sensitivity.
This ongoing verification ensures you realize the full benefit of your retrofit investment.
| Step | Focus Area | Key Outcome |
|---|---|---|
| Audit | Measure current illuminance and fixture wattage | Baseline data for retrofit design |
| Code Compliance | Meet foot-candle and color rendering standards | Safe, compliant lighting design |
| LED Installation | Replace fixtures and optimize layout | 60%+ energy reduction per fixture |
| Occupancy Sensors | Deploy motion detection and zone controls | 40-60% savings in off-peak hours |
| Dimming & Harvesting | Add ambient sensors and time-based controls | Additional 10-20% energy savings |
| Payback Calculation | Factor energy, maintenance, and rebates | 2-4 year payback timeline |
| Maintenance | Establish inspection and monitoring schedule | Long-term performance and savings |
The path to parking garage lighting efficiency is clear.
NexVolt Energy Group handles every step of this process.
Ready to reduce your lighting energy consumption and lower maintenance costs? Get a Free Property Assessment from NexVolt Energy Group and discover how much you can save.
Frequently Asked Questions
How much can parking garage lighting energy savings reduce my utility bills?
LED retrofits typically cut lighting energy consumption by 50-70% compared to metal halide or incandescent fixtures. When combined with occupancy sensors and daylight harvesting, savings can reach 75% or higher. The exact reduction depends on your current fixture types, operating hours, and occupancy patterns. A professional audit identifies your specific baseline and projects realistic payback timelines based on your facility’s usage.
What are the recommended lighting standards for parking garages?
Parking garage lighting requirements vary by zone and function. The Illuminating Engineering Society (IES) recommends 10-20 foot-candles for general circulation areas, 5-10 foot-candles for remote or low-traffic zones, and up to 30-50 foot-candles for entry/exit areas and payment stations. Color temperature should be 4000K-5000K for better visibility and security. Code compliance depends on your state and local jurisdiction; a professional assessment ensures your retrofit meets all applicable standards.
How do parking garage occupancy sensors actually reduce energy use?
Occupancy sensors detect motion and automatically dim or turn off lights in unoccupied spaces. In a typical parking garage, many areas sit empty for extended periods. Sensors reduce light output to 20-30% or switch lights off entirely when no motion is detected for a set time (usually 5-15 minutes). This eliminates wasted energy in vacant sections. Proper commissioning ensures sensors respond appropriately without creating dark spots or safety concerns.
What’s the typical maintenance advantage of LED parking garage lighting maintenance?
LED fixtures last 50,000-100,000 hours compared to 10,000-20,000 hours for metal halide bulbs. This extends maintenance cycles from 1-2 years to 5-10 years, reducing labor costs and facility downtime. LEDs also produce less heat, lowering cooling loads in enclosed garages. Lower maintenance frequency means fewer disruptions to your operations and reduced replacement inventory costs over the fixture lifespan.